Showing posts with label Picture My Life. Show all posts

Saturday, June 11, 2016

Flash Sales Every Friday This Month!

Have you checked out the Flash Sale that is happening on my website right now? They commence each Friday at 3 pm MST and end on Monday. There are product bundles on sale for a discount and Close To My Heart is featuring artwork made with them on their blog.
Check out this fun artwork (above and below) that is just part of what was shared yesterday, using the Display Tray and Picture My Life Cards. What a fun, simple and yet, very meaningful artwork that can serve as decor for your home or as a special gift for someone.
These are one of the bundles available for purchase through Monday or while supplies last. Yeah...I'm definitely headed to purchase this bundle for sure and look forward to decorating the Display Tray. Be sure to check out what other products are available during this weekend. What grabs your attention? You can place an order on my website by heading here.

Enjoy your weekend and remember...Make It From Your Heart!

Sunday, November 15, 2015

Stampers with an Attitude Blog Hop - White Pines

Members of the Stampers with an Attitude Team, with Close To My Heart, are highlighting the White Pines paper pack this month.  This product line has several coordinating options that you will want to be sure you get.

If you are coming from Catherine's Blog, you are on the right track.  She always has fabulous artwork, doesn't she?  Should you get lost along the way, you can find a list of participants by clicking HERE.

These are two cards I made using...card from the White Pines Picture My Life Scrapbooking Program!  I am so proud of myself and love how they came out.  I hope you love them too!
For this card, which only contained the word "joy", I added some light blue water color to the sentiment.  Then, I took these ornaments from another card, fussy cut them and added them to the card front.  I stamped Merry Christmas in Cranberry and of course, added some bling to various places.  The focal point is layered on New England Ivy, although not easy to recognize from this photo.
 This card was trimmed to fit the front of the card base.  A piece of Cranberry cardstock was added at the bottom and Gold Foil Tape was placed along the seam.  Red Enamel Gems were added on the tree and Merry Christmas was once again stamped.
Here is a photo that displays some of the cards available through this program.  In it you can see the Joy card and the card with the ornaments I cut out.  Fun, right?!  These cards aren't just for scrapbooking although I have used them for that too and love it!  (I will be sharing that artwork soon!)
Please consider leaving a comment and then head on over to Tammy's Blog and see what she has to share with you.  Thanks for stopping by and happy hoppin'!

Make It From Your Heart,

Thursday, November 5, 2015

CTMH Paper Blog Hop - White Pines

Thank you for joining my team and I for a Blog Hop featuring the beautiful and festive paper pack, "White Pines".  It is our Christmas paper pack for this year but also offers a lot of versatility with several of the patterned papers.  (The pattern in the bottom left...gorgeous and fun.  This photo definitely doesn't do it justice.)
If you are coming from Sheila's Blog, you are on the right track.  You can find a complete list of participants, and links to their blogs, at the end of this post.  Let's get started, shall we?!

This month I decided to create a home decor item.  I have admired this Hinged Frame Tray for quite some time, finally purchased one, and it has been sitting around since.  (Don't tell anyone I told you that.  LOL)  So it was time to pull it out of its' packaging and create something so here you go!  The tray actually folds up into a a 5" x 7" size so it would be easy to decorate, pack and wrap (and ship, if necessary).  
 While I chose to use the White Pines Picture My Life (aka PML) Scrapbooking Program to decorate the frame, you could definitely include some of your favorite photos instead.  Here is a view of some of the cards included in this program.  The awesome thing about them is they are double-sided with one side containing a vertical design and the other, the same design but horizontal.  Isn't that awesome?  It allows for a lot of flexibility.
Let's take a closer look at the two sides of this frame.  Here is the left side.  Several of the embellishments included (the snowflakes, raccoon, ornaments, and Dec 25 image in this photo) came from the White Pines Complements.  This product item includes two, 6" x 6" coordinating sticker sheets, assorted kraft die-cuts and assorted thick plastic die-cuts that are see-through.  I did stamp "Happy Holidays" using an image from the Workshop on the Go White Pines Cardmaking Kit.
On this right side of the frame, the Merry Christmas card comes without color.  I used the ShinHan Markers to color in the images.  It was fun and hope we get more cards like this in the future!  The NOEL banner...I cut it out of one of the other cards and then made it 3-D here with some Foam Tape.  The deer came from the kraft die cuts and I just chose to add him on the front of the frame.
As I was uploading my photos, I recognized that I could definitely add some bling to some various areas and will be doing so.  In fact, why don't you offer me some suggestions on where I can bling up this frame with Close To My Heart embellishments?  I would love to hear from you!

Hop on over to Melissa David's Blog.  She always comes up with something fun!

Thanks for hopping with us and have a wonderful weekend!


List of participants:
  1. Melissa Robinson *YOU ARE HERE*
  2. Melissa David
  3. Tonya Whitehurst
  4. Katy Taylor
  5. Aggie Peters
  6. Sheila Wilkerson 

Sunday, March 8, 2015

Stampers with an Attitude Showcase Picture My Life

This month, members of the Stampers with an Attitude team (associated with Close To My Heart), are highlighting one of our fabulous product lines, Picture My Life!  It is truly phenomenal and probably my favorite right now since it offers so much versatility that goes way beyond scrapbooking.  However, for this Blog Hop, I did decide to use it as created (but don't be afraid to step outside of the box as I am sure you will seen done on other posts).
If you are coming from Catherine's Blog, you are on the right track.  She is a start of the hop and a complete listing of blog participants are located on her blog as well as at the end of this post.

I decided to use the Chalk It Up Picture My Life Scrapbooking Program for my layouts today to commemorate the 2014-2015 when I served as Principal of two elementary campuses in southwest New Mexico.  I still have plenty of pages to create but am thrilled with some of the first few pages.
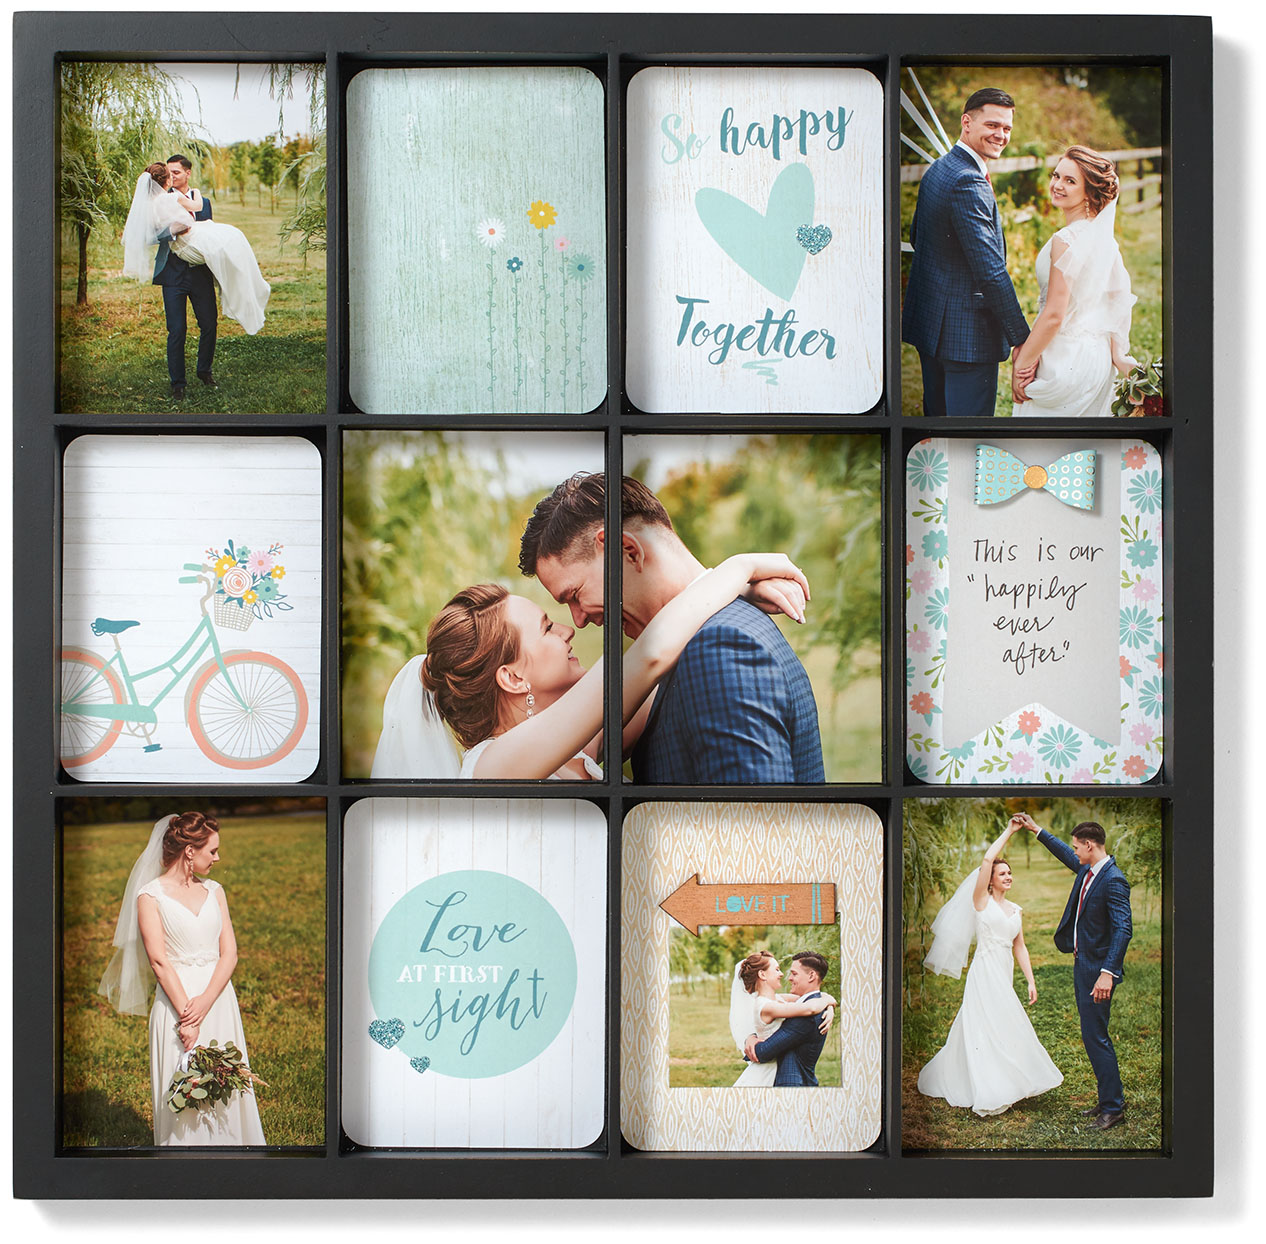
This is a sample of some of the cards contained in the Chalk It Up program.
You will definitely want to click on the photo for an enlarged view but aren't these class photos just precious?!  I am including the student's names on the back of the card for future reference.  It will be fun to see what these little kiddos turn out to be in several years.
FULL LAYOUT - Click on the image for an enlarged view.
Because all of the class photos were given to me in small sizes - 3 1/2" x 5" - I used some of the 4" x 6" cards as mattes for the photos (and also added some additional mattes in some cases).  I did not want to detract from the photos but instead, get them out of the plastic bag they were in so I can review them from time to time and remember the fun memories of last school year.
LEFT PAGE - Click on the image for an enlarged view.
You can take the cards and simply slide them inside the pocket, adding in your photos and journaling, or you can be a little creative as I have done on some cards.  Here, I used an exacto knife to trim around this makeshift sticky note, allowing my photo to slide underneath it.  Cool, right?!
Click on the image for an enlarged view.
On this page I did include some other cards and techniques just to add to the layout.
RIGHT PAGE - Click on the image for an enlarged view.
 This "Reach for the Stars" banner was located on the center of this 4" x 6" card I used as a matte.  I just cut it out of the card, with an exacto knife, and put it as a 3-D banner on the corner of the photo.  Gotta love being able to use your cards for more than just one thing!
Click on the image for an enlarged view.
 These two sayings, "Keep your face towards the SUN and..." "...the SHADOWS of life will fall behind you" were parts of another card that I trimmed and added with some 3-D foam tape.
Click on the image for an enlarged view.
I hope you love my layout as much I do!  I totally had fun creating it and cannot wait to add in more photos.  This was just Pre-K and 2nd grade!  I have to do all the way through 5th!  WHEW!  Thankfully, Picture My Life will make that Faster. Simpler. Easier.  :)

Please consider leaving a comment before hopping over to Sheila's Blog to view her fun creation!

Here is a list of participants and links to their blogs:
  1. Catherine Nowak
  2. Melissa Robinson
  3. Sheila Bennett
  4. Belinda McLane
  5. Jen Patrick
  6. Christy Geyer
  7. Denise Elliott
Happy hoppin'!

Saturday, March 7, 2015

March Card Workshop - Hopscotch Picture My Life Cards

Join me on March 30th, from 6:30 to 9:00 p.m. in Mansfield, TX, as we make these TEN fun cards using the Hopscotch Picture My Life (PML) Scrapbooking cards.  For just $20 you will get half a set of the PML cards, plus all the extra goodies to make the greeting cards, and will be able to use the other PML cards as you choose on your other projects.  (Don't live locally?  That's okay.  I will mail you the kit for just $25!  Read below for further details.)
 We will add some Gold Sequins, Flaxen Thick Twine, and the Junebug Puffies to cutesy them up.


 Some cards also include some stamped sentiments.


Aren't they fun and cheerful?!  And truly, the photos don't do them justice.

If you would like to attend my class and live locally, visit this Meetup site to sign up.  Payment is required at the time of RSVP as supplies are ordered specifically for those who will be in attendance.

If you and a few friends would like to gather at an other location in the metroplex, let me know.  I'm up for that too!

And...if you need a kit mailed, just select the $25 payment option - to include shipping to your doorstep - and everything will arrive pre-cut, pre-stamped and ready to assemble.  Please allow two weeks for delivery.  (If you are a Consultant and would just like the cutting diagrams and directions, those cost $8 and you can select that payment option below - being sure to include your email address.  These will be sent within 48 hours of receipt of payment.)

Workshop Fee Options
Shipping OR Email Address


I look forward to preparing a kit for you!

Sunday, February 15, 2015

CTMH Technique Blog Hop - Music to the Eyes

If you are coming from Michelle's Blog, you are on the right track.  There are 15 of us participating in this hop and you can find a complete list of participants by visiting Sheila's Blog.

Thank you for joining us this month as we highlight a technique, which is both simple and fun, that jazzes up your artwork creations with the little help of a Journaling Pen.  I love to use a journaling pen to add a little "extra" to my projects when it needs just a bit more.  This is how the technique reads as found on page 34 in our Annual Inspirations Idea Book:  "Jazz up your pages with a journaling pen and your creative hand!  Outline individual letters and other accents with the pen to better contrast them with the background, making them bolder and easier to read."

On this card, made with two Hopscotch Picture My Life cards, I used the journaling pen to doodle around two pieces of paper (one B&T and the other cardstock) and around the small sentiment.
With the sentiment, I kept things very simple and just drew lines around the banner.  With the other two pieces where this technique was applied, I simply allowed my hand to move freely and wanted the lines to appear curvy.  Then I went back across the same area, still allowing for free movement, while working to make the two lines intertwine.  There really is no way to do this "wrong" so why not give it a try?  I find that if my artwork is needing just a little more, some doodling with the Journaling Pen will probably to the trick! (It is just $3.25!)

Now, head on over to Debi's Blog where you are sure to find something ingenious and fun!

Happy hoppin'!

Sunday, February 8, 2015

Spotlight on Seasonal Expressions

We are highlighting some of the fabulous products that were released in December and included in the Seasonal Expressions supplement.  
If you are coming from Hilary's Blog you are on the right track.  There are nine of us sharing our artwork so I hope you enjoy what you see!

I decided to incorporate a Hopscotch Picture My Life Card for the focal point on this handmade card.  For right now, this Picture My Life card set is my favorite.  I love the fun colors!
I layered the 3" x 4" card onto some White Daisy cardstock, deciding I did not want to corner round the corners and then made it 3-D with our THIN 3-D Foam Tape (yeah...another new-found love)!  I used our Gold Sequins, Gold Shimmer Trim, a Junebug Puffie (soon to retire), and some Flaxen Extra Thick Twine (also soon to retire).  I separated the twine to have the doubling on the bow.
While this card was super fun and easy to make, I hope the recipient (whoever that may be...) loves it!

Feel free to leave a comment and then head on over to Wendy's Blog.

Here is a list of the items that will be retiring March 31st.  Be sure to check them out before you can no longer order them!
  • C1606 A Thing Well Done (only available to Hostesses)
  • B1471 Variety of Thanks (only available to Hostesses)
  • B1472 Love This Story (only available to Hostesses)
  • X7193B Heartstrings Paper Packet
  • X71934C Heartstrings Complements
  • Z3015 Heartstrings Assortment
  • G1090 Workshop on the Go Heartstrings Cardmaking Kit
  • X7194B Hopscotch Paper Packet
  • X7194C Hopscotch Complements
  • Z3016 Hopscotch Assortment
  • G1091 Workshops on the Go Hopscotch Scrapbooking Kit
  • Z3045 Picture My Life Hopscotch Scrapbooking Program
  • Z3046 Picture My Life Heartstrings Scrapbooking Program
  • Z2056 Cut Above Valentine Treat Bag Kit
  • Z2059 Cut Above Birthday Treat Bag Kit
  • Z3028 Lovestruck Mini Clothespins
  • Z3029 Happy Day Mini Clothespins
  • Z3037 Stuck on You Puffies
  • Z3038 Junebug Puffies
  • C1617 You're the Bomb
Have a blessed week and happy hoppin'!

Friday, January 30, 2015

Small Gifts Go Great in Pillow Boxes!

Ever need a fun way to package a smaller gift?  Our My Creations Pillow Boxes are perfect for just that!
I took a 3" x 4" card from the Picture My Life Heartstrings Scrapbooking Program and glued it to the front of the pillow box.  A little bit of  Clear Sparkles, colored with a Shin Han Marker, some Teal and Silver Shimmer Trim and my decorated gift container was complete!
Gotta love when something cute can come together so inexpensively and quickly!

Make it a FABULOUS Friday!

Wednesday, January 28, 2015

Show Your Love - Valentine Blog Hop

With Valentine's Day just around the corner, we wanted to take a few minutes to showcase some fabulous artwork creations, using Close To My Heart products.  They'll make your gift-giving quick, easy, and inexpensive - and CUTE!

If you are coming from Aggie's Blog, you are on the right track.  A list of participants is found at the end of this post.

Picture My Life cards are so versatile.  I choose to use one as the focal point on this hand-designed gift bag, perfect for that special gift.  Paired with some Black and Lagoon cardstock, as well as some Lagoon Hearts Washi Tape, it didn't take much to cutesy up this red bag that started out plain.
 I added some Teal and Silver Shimmer Trim and Stuck On You Puffies for some added detail.  (Despite my efforts to get a great picture, it looks totally fab in person!)
The Heartstrings PML line is absolutely stunning and can be used for various artwork creations.  (I've made cards, treat items, layouts and gift bags with them.) They are too fun and you can't beat their phenomenal price!  If you have not tried them, you will definitely want to add them to your next order.
Head on over to Melissa David's Blog to see what she has up her sleeve, but feel free to leave a comment before doing so.

Here is a list of the participants and links to their sites, should you get lost along the way:
  1. Melissa Robinson (*you are here)
  2. Melissa David 
  3. Debi Barber
  4. Judy Faye Garner
  5. Tonya Whitehurst
  6. Aggie Peters
Happy hoppin'!