Showing posts with label #paperpiecing. Show all posts

Monday, July 18, 2022

Summer Fun Heart 2 Heart Challenge

Hello and welcome to this week's Heart 2 Heart Challenge, "Summer Fun". Using any Close To My Heart products, you can also participate in this challenge by linking up on the Heart 2 Heart Blog. All you have to do is create something inspired by "Summer Fun". I look forward to seeing what you have to share. 


This card screams beach and summer to me; where I'm looking forward to visiting soon!

To create the sand, I used Toffee cardstock and stamped the beach portion from the Writing in the Sand stamp set. I did paper-tearing on the sand and ocean paper pieces. 


The Beach Party-Cardmaking Stamp + Thin Cuts was used. It contains these adorable images. Aren't they cute?! I wanted to incorporate more but knew I needed to stop somewhere. I'm excited to use the others soon!


I did paper-piece the palm tree leaves and beach umbrella for a fun look. Of course, I could not resist adding the flip flops from the Beach Party Rubber Shapes. (You need to check out if you have not already done so.)

I am enjoying the summer and hope you are too, thankful I can enjoy the AC on the hotter days. 

I look forward to seeing what you share with us!

Monday, April 19, 2021

"Old & New" Challenge from Heart 2 Heart

Welcome to this week's Heart to Heart Challenge, titled "Old & New". You can interpret it to your liking as long as you are sure to incorporate at least one product from Close To My Heart

Once you create your artwork, link up to the bottom of the related post on Heart 2 Heart. We host two Challenges a month and enjoying seeing how you interpret the theme. If you have any questions, please let me know! 


This is the artwork piece I want to share with you today. I purposefully took it at this angle so you can experience a great appreciation for the beautiful rose gold details on this paper. Isn't it gorgeous?! 


You might not recognize this paper which is part of the "New" portion of my card and post. The paper used, that contains the rose gold accents, is contained in one of the National Scrapbook Day workshop kits. (And it's a sneak peek of our May special.) It is part of the "Party Girl Scrapbooking Workshop Kit". I couldn't resist incorporating it into my creation.


The "Old" part of the theme can be referenced in a couple of different ways. In wanting to create a Slimline Card, I decided to pull out one of my retired CTMH How-To Books, "Wishes". It contains designs for 8" x 3" cards and I used it to create this one that measures 8 1/2" x 3 1/2".

Our How-To Books provide design and sketch ideas for both cards and layouts. We have our most recent ones available so be sure to check them out. They are definitely one of my favorite and top-notch products from CTMH! 


I used the Stitched Florals Stamps & Thin Cuts and Sentiments by Melissa Esplin stamp sets. They could actually be considered "old" or "new", dependent upon an individuals point of reference. LOL I'm going to consider them "old" in that I purchased them soon after they were released and that has been quite some time. 


This is an image of the card from a top-view. 


To create the flowers, I incorporated some paper-piecing and added a bit of coloring, from the Tri-Blend Markers, to create additional dimension. Cardstock colors used: Peach, Raspberry, Glacier, and Sapphire.


This angle is intended to show you the dimension of the paper-piecing and the Wood Heart


Look at the rose gold accents on this sheet of Peach. Isn't it as beautiful as well?

I do appreciate you stopping by today and have enjoyed sharing this with you. I can't wait to create more artwork using this BEAUTIFUL and exclusive paper, that will not be around forever! 

Be sure to consider joining the creative fun on the Heart 2 Heart Challenge. I hope to see your creations there!

Sunday, October 18, 2020

CTMH Core Idea Book Blog Hop


Do you have a hard copy of this NEW Core Idea Book? If not, you are missing out on some fabulous contents on the inside. It has wonderful artwork and NEW products AND you can get it FREE with any size order through December 31st. (If you want to peruse the digital version, you can click here.)

If you are coming from Wendy's Blog, you are on the right track. You can find a complete list of participants by clicking here

I am so excited to share this greeting card with you! I absolutely LOVE how it turned out, although it will be a one-of-a-kind with all the detail I included. LOL

It was made with the Stitched Florals Stamp & Thin Cuts set. This stamp set totally caught my attention in the Idea Book and I enjoyed creating with it. I am ready to make some more items using it. 


To tell you a little bit about the details I included...

I did stamp the main floral image onto a piece of White Daisy but I chose to also do the same on the different colors of cardstock so I could do some paper-piecing. There is a lot going on right here but don't you just love the layers?! I do! It created such great dimension for a finishing result.

The bow is one of our new Thin Cuts (this is the small one) - which I can't wait to use more. I couldn't resist splashing some of the Lemonade Shimmer Brush on the background for some added texture. 


The patterned paper I used is from our Bloom with Grace paper pack.

I always enjoy sharing my artwork with you and appreciate you stopping by. Now head on over to Michelle's Blog to see what she has created to share with you. 

Keep creating!


Wednesday, July 15, 2020

The Pretty of Paper-Piecing (CTMH Technique Blog Hop)


Welcome to our Technique Blog Hop where Close To My Heart Consultants are featuring our products aligned with the theme of "The Pretty of Paper-Piecing". It will be fun to see what each has created by incorporating this fun technique! 

If you are coming from Brenda's Blog, you are on the right track. You can find a list of participants at the bottom of this post. 


For my artwork I decided to get a little cra'y cra'y with paper-piecing and elected to do so on all of the petals from this gorgeous floral image. 


It comes from the "Brushed" Special, an exclusive collection only available through the end of this month, while supplies last. 

If you are wondering, "What is paper-piecing?" Keep reading and I will show you. 


Paper-piecing is where you take a stamp image and stamp it on patterned paper (or solid), cut out the desired images and then glue them to the "base" image. This technique allows you to get various patterns on your image that you couldn't get by using a coloring medium. 

When I paper-piece, I cut in the "middle" of the outlined image because you'll get that black outline, in this case, by both the piece and the base. 


Because I wanted to fully focus on incorporating this technique, these are the papers I stamped on. The patterned paper comes from our Mix-In (a definite fave of mine). Then Smoothie is to the left of it - both the front and back sides for two different hues. Last, I used Peach cardstock, on the light side. 


By cutting out the respective images, and gluing them as you see on the finished flower, I achieved  some fun texture. And...check out the cute polka dot leaves! Aren't they awesome? I incorporated them by stamping on the patterned paper that is contained in the "Brushed" Collection and then paper-pieced them in the same was as explained above. 

Of course I had to add some sparkle to the center of the flower. To do so I stamped the flower on Lemonade cardstock (light side) and then paper-pieced it, although 3-Ding it to the center. Then, some Diamond Stickles was added which allows the yellow cardstock to show through. (The center of the flower did bleed a little bit because I forgot I was going to add the Stickles and didn't use the Archival Black Ink Pad. However, rather than redoing it, I left it alone because I felt it provides for a bit of imperfection, just like any flower.) 


Here is one more card to share with you. I paper-pieced the girl's dress in the image contained in the July Stamp of the Month, "For My Beautiful Friend"


You can see that more closely in this image. Doesn't she have such a cute dress?! And...I didn't even have to color it! LOL

I appreciate you stopping by and hope you'll leave a comment to let me know what you think about paper-piecing and/or my creations! Now, head to Brandi's Blog to see what she has created to share with you. We appreciate you supporting our Blog Hop!


LIST OF PARTICIPANTS:
1. Melissa Robinson *YOU ARE HERE*

Sunday, September 15, 2019

"It's in the Script" - CTMH Technique Blog Hop


Welcome to this month's Technique Blog Hop where we use Close To My Heart product to highlight a fun technique. We've got "It's in the Script" for you, for September, where participants can incorporate various stamp sets OR a fabulous NEW Penmenship Book, and pens, from Melissa Esplin. I'm excited to see what everyone has to showcase and I hope you are too!

If you are coming from Terry's Blog, you are on the right track. You'll find a complete list of participants at the bottom of this post. 


In wanting to make a birthday card, and incorporate a new stamp set, this is what I chose to create. I love the sentiment and script used for "birthday", plus it was a great image for paper-piecing the cupcake image.

Cardstock and patterned paper from the Mix-Ins Paper Pack and Every Little Thing were used. Of course, a little ribbon and Julep Glitter Gems can't help but bring the perfect finishing touch. 


This is the fun stamp set I chose to use, "Sweet Birthday Wishes" that is perfect for celebrating such an occasion.


Here is a close-up of the paper piecing and use of Liquid Glass on the cherry. 

The image was stamped multiple times, first, on the base patterned paper and then again on Smoothie and Mint cardstock. The frosting and cupcake holder were cut out of the respective cardstock pieces and glued on top of the base image. A marker was used to color in the cherry and then Liquid Glass was added to it. 

I'm please with how this turned out and had a great time making it! Considering leaving a comment before you head over to Michelle Loncar's Blog to check out what she has to share with you. And then, don't forget to continue making your way around all of the artwork. There's no doubt you will be inspired. 

Make it from your heart!

Participants:
1. Melissa Robinson *YOU ARE HERE*

Saturday, September 15, 2018

Sew What?! - CTMH Technique Blog Hop


Welcome to this month's Technique Blog Hop where we use Close To My Heart products to highlight different techniques. This one is called, "Sew What?!" The participants can incorporate stitching - real or faux - on their artwork. It will be fun to see what everyone has created to share!

If you are coming from Vandra's Blog, you are on the right track. You can find a list of participants at the bottom of this post, if you were to get lost along the way.


I couldn't help but make another card using the September Stamp of the Month, "Sweet Treats". Ballerina, one of our new colors, was incorporated for a soft pink look. 


This time it was a must that I incorporate the cute mug and whip cream. Remember, you can get this stamp set for $5 - during this month only. 
The patterned paper comes from our Season's Mix-ins which is designed to coordinate with the other paper collections in the Idea Book


Years ago we had a stamp set that resembled stitching and I have kept it all this time. I was thrilled to see this new one, "Stitched Borders", in this new Idea Book. It was one of the first I purchased and I'm sure I'll be using it frequently. In fact, my friend, Katy Taylor, used it in very creative ways when she showcased her artwork at Convention. I do plan on copying her at some point. ;) 


On the close-up of the focal point, you can see that I paper-pieced the mug - isn't it cute?! I also random-stamped the Ballerina cardstock piece with the small floral image from the stamp set. Stiching was also added around the sentiment and you can see the zig-zag stitch above the patterned paper.

While it's not depicted great in the photo, the Scallop Border Thin Cut is cut out of Silver Foil Paper. A few Clear Sparkles were added.

Thank you so much for stopping by.  Consider leaving a comment, if you would like. I always love to hear from you!

Now, head on over to Haley's Blog to see what fun she is showcasing for this Hop!


Participants:

1. Melissa Robinson *YOU ARE HERE*
2. Haley Dyer
3. Debi McBain
4. Wendy Kessler
5. Michelle Johns
6. Michelle Loncar
7. Marciava Warrell
8. Darlys Recker
9. Kimberly Bower
10. Catherine Nowak
11. Annemarie Julian
12. Valerie Kapsha
13. Vandra Stenton

Friday, June 15, 2018

Mini is Marvelous - CTMH Technique Blog Hop

Thank you for joining us for this Technique Blog Hop as we feature artwork that [somewhat] aligns with our theme of "Mini is Marvelous"! Participants have the opportunity to interpret that in any way they can so I am sure we are bound to see some GREAT stuff!

If you are coming from Katy's Blog, you are on the right track. You can find a complete list of participants below, if you were to get lost along the way.
My "mini" is interpreted in the way of "mini pieces" which were used to cutesy up this awesome new Thin Cut that just debuted in our newest Idea Book. Believe me, there were A LOT OF MINI PIECES but it made the final result well worth it!
This thin metal die, It's Your Day, comes as one piece and there are some fun ways to use it like that. However, I decided to do some paper-piecing so that I could get different papers in various areas of the diecut image. (The cut shape is 3 3/4" x 5".)
To get this end result, I cut this Thin Cut onto four different pieces of paper. First, it was cut on Raspberry cardstock. Next, I also cut it on Gold Glitter Paper, Gold Foil Paper, and lastly, on the striped patterned paper that is part of Documented.

I carefully trimmed the pieces that I wanted to 3-D/layer onto the Raspberry base so they would fit as desired. I had the "your" banner and the many mini pieces of paper for the candles and flames. I used our Bonding Memories Glue Pen for adhering all pieces of the Thin Cut.

I LOVE the result of these efforts - well worth it, although a bit crazy - and hope you do, too!

Now, head on over to Michelle's Blog to see her "mini" creation; whatever that might be. Thanks so much, as always, for stopping by and please consider leaving a comment before hopping to Michelle. Enjoy your weekend!


List of participants:
1. Melissa Robinson *YOU ARE HERE
2. Michelle Loncar
3. Debi McBain
4. Catherine Nowak
5. Haley Dyer
6. Danielle Wagner
7. Darlys Recker
8. Michelle Johns
9. Wendy Kessler
10. Marciava Warrell
11. Katy Taylor

Thursday, May 10, 2018

In Any Case...with Melinda & Melissa

I'm thrilled to have you here for this evening's episode of...
Join us twice a month as we CASE, “Copy And Selectively Edit”, artwork created by the Art Department of Close To My Heart as showcased in the current Idea Books and our Make It From Your Heart How-To Books.

On the 2nd and 4th Thursday of each month, at 7 pm CST, we will direct you towards a piece of art and recreate it using the exact products or others that compliment its initial design. Tips, techniques and assembly directions will be shared in detail to help you recreate them on your own.

As you reproduce the items we have shared, post them on social media using the hashtag #ctmhinanycase. We will randomly search that hashtag and reward those who CASE our items. Winners will be announced on our blogs so be sure to follow us!

********************************************************************************
If you haven't already heard (or seen), we have a new Seasonal Expressions Idea Book that was released on May 1st. This is the cover of that beauty with plenty of new products and artwork samples showcased inside. While I've already identified quite a few must-haves, I decided to highlight a NEW Thin Cut that is completely fun! (If you would like to view the contents of the Idea Book, virtually, you can click here. Want a hard copy to physically flip through the pages? It is included FREE with every order placed on my website or you can contact me directly if you want me to mail you one.)

Don't forget, my partner in CASEing is Melinda Everitt and she has a fun product to share with you as well. Be sure to read to the bottom of this post and then follow the link.
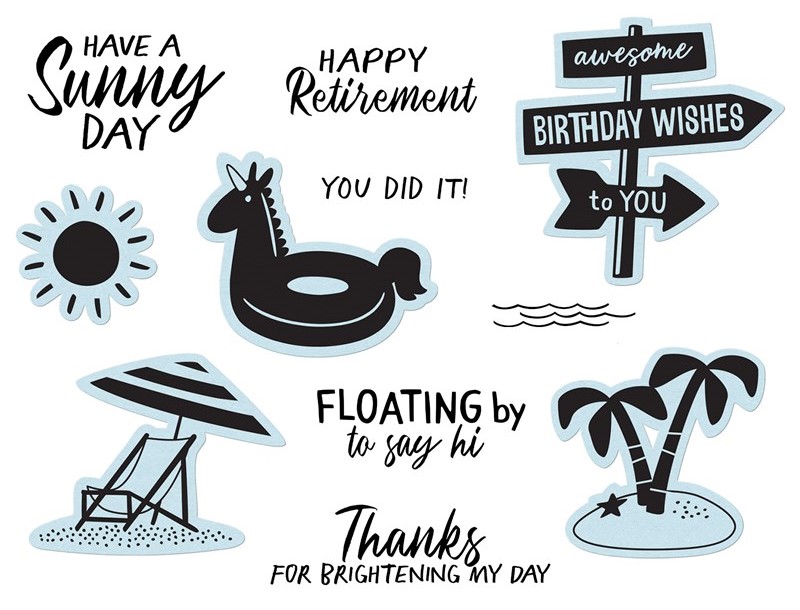
First of all, doesn't this image just make you happy? I love the beautiful colors and fun favors perfect for birthdays or other celebrations. Today I am CASEing the image used as a decor' item, the "It's Your Day" frame (arrow is pointing to it), in this image. 
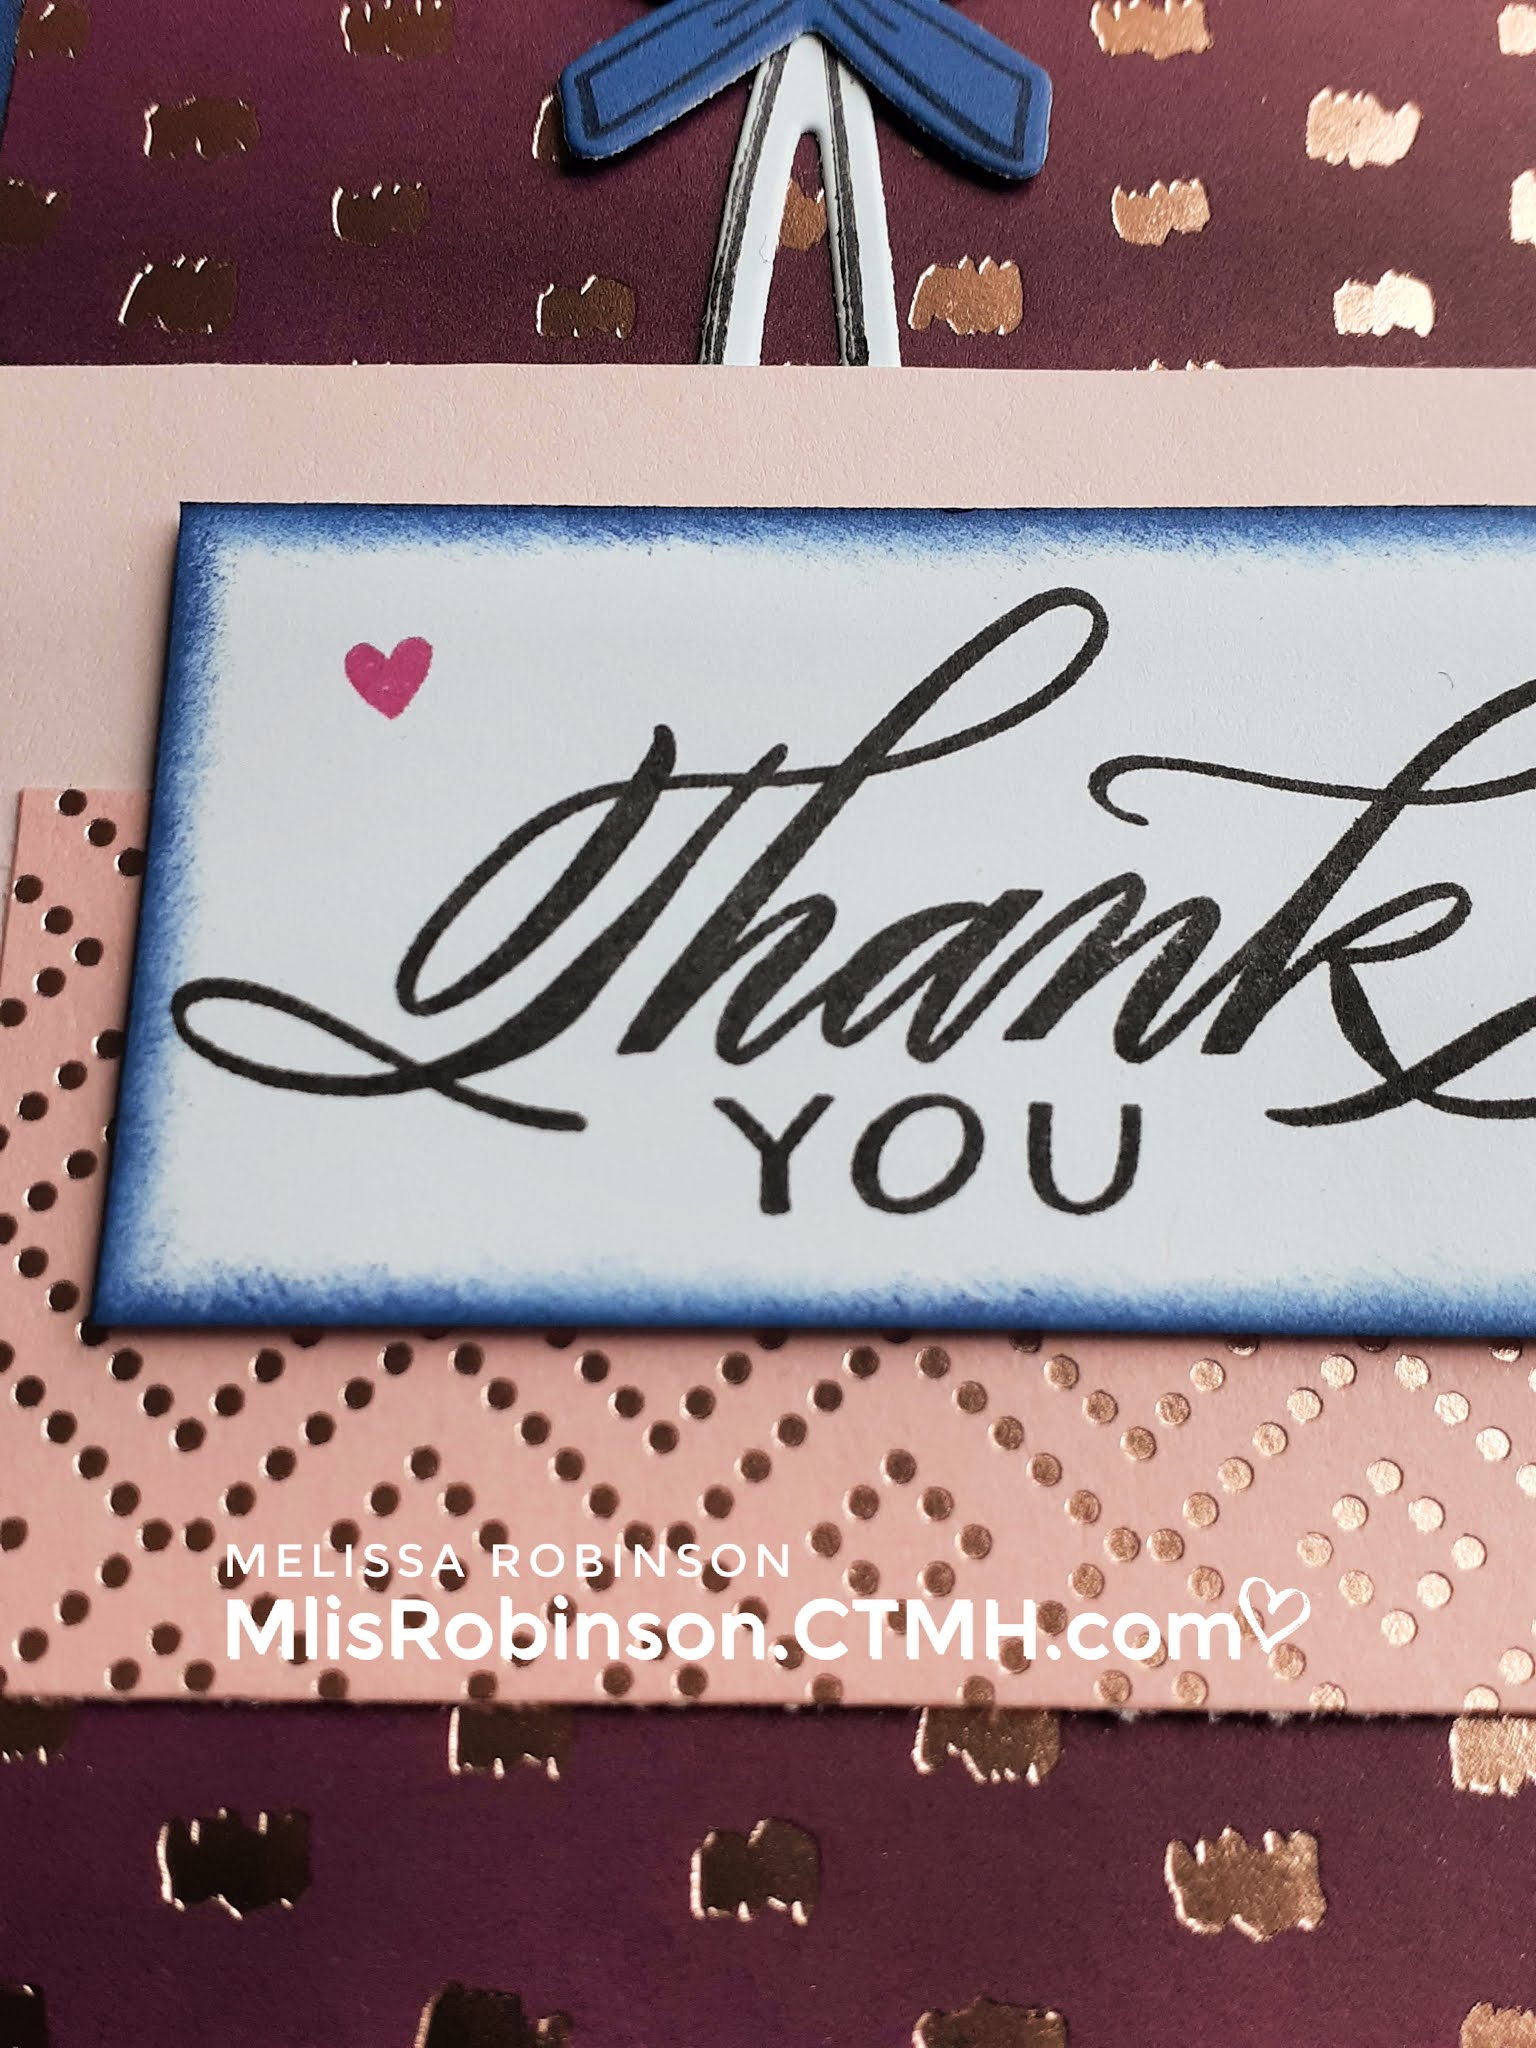
Let's first examine the Thin Cut I used called, "It's Your Day". It measures 3 3/4" x 5", also perfect for placing on a card front as I did with my creation. It is a thin metal die that cut easily using a Cuttlebug. To get the look of the artwork sample, I took it through the diecut machine four times:

Then, I trimmed the needed pieces, in the respective paper, and glued them on top of the main frame as intended. This is called paper-piecing. 

To adhere the pieces easily, I used the Bonding Memories Glue Pen. It has a small tip that is perfect for small pieces. 
Here's a closeup so you can better see the detail.

I totally love how it came out and have already created another sample with this Thin Cut. In fact, there is a similar one that says, "A Big Thank You". It can be used in a similar way so be sure to check it out.
Now it's time to check out the wonderful card that Melinda is highlighting. It is the one in the middle of this image. Isn't it beautiful? When you head to her blog, she'll share information on how she recreated it and you'll want to be sure to head over there by clicking this link.

Thank you so much for stopping by! We'll be back in two weeks for the next CASE! See you then!