Monday, December 30, 2013

Banana Nut Bread

Not only is banana nut bread one of my husband's and dad's favorite baked treats, it is also one of my favorite (and easiest) homemade goodies to make.  It is perfect at any time of the year but especially during the CHRISTmas season when I enjoy baking (but do not need to eat the results).  I made a loaf a few weeks ago for an event at work and figured I would share this recipe - for now or for later.
This recipe was given to me by my Mom, is tried and true and never fails me.  Let me know if you give it a try and what you think of it.  I bet you will think it is yummy!

Ingredients:

  • 1 cup sugar
  • 1 1/2 cups flour
  • 1 cup melted margarine
  • 1 teaspoon soda
  • 2 eggs
  • 2 ripe bananas, smashed
  • 1 cup chopped nuts

Mix bananas, sugar, butter and eggs.  Sift flour and soda in separate bowl.  Add to first ingredients.  Add chopped nuts.  Bake in greased loaf pan at 350 degrees for 60 minutes.

It is as easy as that.  My hubby had me include blueberries one time and it was tasty too.

ENJOY!

Saturday, December 28, 2013

It's Still Christmas!

An unintentional hiatus was taken from blogging during the last couple of weeks of school before the winter break.  And since then...some much needed rest and relaxation!  I was up to my ears in tasks and responsibilities and they have not disappeared.  I just am vowing not to work on those not-so-fun tasks until Monday.  When that day arrives, I will do so little by little...

I do love this time of the year, especially when I do not live in an extremely cold area.  I can appreciate the cooler temperatures, the beautiful Christmas decorations, and the yummy smells of the holiday season.  Christmas sure is different these days as a grown person.  :)  I remember, when I was a little girl...  On Christmas Eve we would go look at Christmas lights in the area, giving time for Santa to make a stop by our house.  We always knew he would come during that ride so we could not wait to leave...and return.

What I do appreciate about being an adult, is truly valuing the meaning of Christmas.  It is not about the gifts.  It is about celebrating the birth of Jesus Christ.  "For God so loved the world that he gave his one and only Son, that whoever believes in him shall not perish but have eternal life."  (John 3:16)

I am thankful for many things in my life including my Lord and Savior, my hubby, my family (parents, sister, grandpa, niece, in-loves), my health and my career.  I am truly blessed and thank God for bringing me into this world to enjoy a blessed life.  

It is hard to believe there are just three days remaining in 2013.  I cannot wait to see what God has in store for me and my family in 2014!  Have a blessed weekend and...
(We'll see how that all turns out. LOL)

Sunday, December 8, 2013

Flip Flaps Rock!

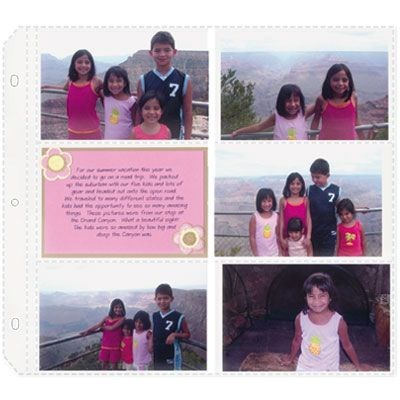
"What are flip flaps", you ask?  They are cool "sleeves" that make your scrapbooking pages, and other fun things, interactive!  Here is a sample of how one can be used in an album.  They are perfect for adding more photos to your pages, including photos you want to keep but do not want everyone to see, or for personal journaling.

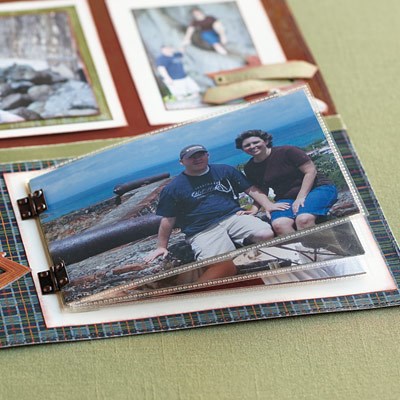
You can also use them in other fun ways like this!

This is not a card but instead, a cute little memory book made out of Flip Flaps (I put four of them inside) with cardstock serving as the front and back covers.  Cute, right?  My friend, Teri, made one for me as a roomie gift three years ago for Convention.  Crazy how fast time passes. I miss her and our times together.  And I digress... :) Read below for further details on how I created this fun item.  

I cut two pieces of Ruby cardstock to measure 7 1/4" x 4 1/2".  I then scored both the front and back covers at 7/8".  

I stacked and adhered four, 4" x 6" Flip Flaps, on top of each other.  (There are adhesive strips on the left margin.)  I placed them on top of each other so the opening for the photo was on the back of each.  You can put a photo on the front and back of each Flip Flap, allowing for a total of eight photos and/or journaling spots to be included in this brag book.  Add more flip flaps if you would like.  

Following Teri's lead, I chose to punch five holes on the spine of the book (through the Flip Flaps) and put Silver Brads to hold the book together.  (You could also tie it together with ribbon, Baker's Twine, etc.)

Then, I stamped this CUTE penguin from one of our Hostess-exclusive stamp sets on White Daisy Cardstock, the patterned B&T, Ruby cardstock and Whisper cardstock.  I cut out the respective pieces, as shown below, out of the various images so I could Paper-Piece the penguin's outfit.  (No markers needed.)  

Believe it or not, fifteen - YES, FIFTEEN - 
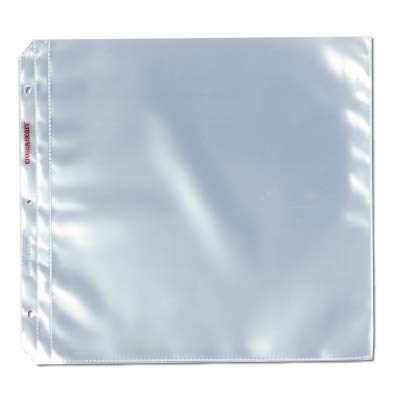
Flip Flaps are just $3.95; that is $0.26 each!  Without taking the time to specifically calculate the cost of this fun item, I would guess it did not cost me much more than $2 to create! 

If you are interested in purchasing Flip Flaps (they also come in other sizes) or any other CTMH product, please visit my website by clicking here.  I am happy to answer any questions you have about the directions for this brag book and would love for you to leave a comment and let me know how you like it.

Enjoy the rest of your weekend and stay warm wherever you are!

Saturday, December 7, 2013

Just My Grandpa and Me

My Grandma Rita passed away in June this year and I have missed her so much.  I will do little things, like cut a piece of Velveeta cheese off the block when I am making chile con queso, and think about her doing the same except...hers would have been a HUMONGOUS piece!  At times it hits me that I am not able to hear her voice or feel her soft hands and it is at those times that I miss her most.

With that being said, I am thankful to have known my Grandpa my entire life and still have him today.  He is a pretty cool guy and cracks me up at times.  He is a little too witty and keeps us quite entertained.  He was chillin' with us on Thanksgiving Day, watching some football, and we took full advantage of this time with him for a quick photo op.  

And my niece...many people think she looks and acts like me.  I will take it.  I am honored and blessed.

Thankful for many things, every day...  Have a wonderful weekend!

Thursday, December 5, 2013

Clearly The Best: Subway Speak

You have to check out this video for a fun technique and a great gift idea - perfect for Christmas - for that person who has everything!


The 6 x 6 Canvas is just $4.95 so you can purchase three of them, as shown in the video, for less than $15!  Can't you just imagine the possibilities for this fun product?  How cute would it look with a photo of a grandchild for a grandparent?

The Pearl Paint and Re-Inkers (of a variety of colors) are also low-cost making the potential for this gift even better!

Don't forget my Cyber Sale SPECIAL going on through Saturday!  You can find the details here.

20 days and counting...well kind of... (I am not trying to rush it.)

Wednesday, December 4, 2013

I have a little secret...

Our fabulous 12 x 12 Memory Protectors, which you can currently get at an awesome price of just $22.95 for 50 protectors, will be going up in price when our Spring/Summer Idea Book is released on February 1st.  Now is a great time to take advantage of the lower price and stock up on these awesome, high-quality protectors. You can also purchase a pack of 10 for $5.95 if you prefer a smaller quantity.

Close To My Heart prices have not gone up in years.  This increase is due to an increase in production costs and a fabulous new product line that will be released in the upcoming Idea Book.  WOOHOO!  I can't wait to see what they have up their sleeves!

Enjoy this first week of December,

Tuesday, December 3, 2013

Not a scrapbooker? Totally fine.


But...do you post plenty of pictures of your special events on Facebook, only for there to be no record of the details of those fun events?  Or...do you have photos hidden away some place in your home?
How are family members who do not posses the same memory of an event going to value the photos?  Will they know where the photo was taken or who the people are in the photo?  What legacy are you leaving besides a box of photos stored under a bed or in a closet somewhere or a multitude of photos on Facebook that do not tell the story?  I love to scrapbook; I realize not everyone does.  However, there are ways for you to preserve your memories without "scrapbooking".

Consider getting your photos out and display them, even in a simple manner like this. These 12 x 12 Memory Protectors - Design 2 store 12 - 4 x 6 horizontal photos (6 on each side).  In this case one of the pockets has been used to journal about the story included in the photos.  How simple is that?
These 12 x 12 Memory Protectors Design I have six, vertical pockets that hold 12 - 4 x 6 photos (6 on the front, 6 on the back).
This is a perfect gift for yourself, your family, or how about for your parents or grandparents who have their own  photos stashed away somewhere?  Get those photos out.  Get them visible so they can be enjoyed; so others can smile and laugh at the fun memories those photos elicit when you look at them.

We have a fabulous selection of albums to put these pocket pages in.  You can view the various color options by clicking HERE.

If I can help you in considering this viable option for preserving your memories, please contact me.  You don't have to scrapbook to tell your story.

With something to think about...this is...  :)

Monday, December 2, 2013

Cyber Monday Sale - ALL WEEK LONG!

In honor of Cyber Monday and not having to fight the crowds for your holiday shopping needs, I am offering a little special of my own through the end of the day Saturday.  Please continue reading below the notice for complete details on how you can make the most of your purchase.


As noted above, with every $50 purchase you can select one of our exclusive MyReflections paper packets for FREE!  You can choose from:  Laughin Lola, Sarita, ProPlayer, Babycakes, Huntington or Frosted.  Click here to view your options.  Your FREE item will be sent to you separately no later than December 10th.

In addition to the free paper packet, you can also collect on additional FREE product with every $100 you purchase.  Choose one "star" item from the Holidays from the Heart Gift Guide FREE.  You will be prompted for this selection as you place your order.  Star items include:
  • Sparkle & Shine Paper Packet (X7176B)
  • Sparkle & Shine Complements Dimensional Elements (X7176C)
  • Magical Days Stamp Set (D1552)
  • Santa Claus Stamp Set (C1567)
  • Mary and Babe Stamp Set (C1562)
  • Trim the Tree Stamp Set (A1149)
  • Charming Chevrons Stamp Set (A1150)
  • Lots of Love Stamp Set (A1151)
  • Angel Friends Stamp Set (B1435)
  • Lifting Spirits Stamp Set (C1570)
  • Banner Wishes Stamp Set (B1438)
These are some cards made with some of the items from the Gift Guide.  Pretty, huh?
You can either shop online through my website or view an online copy of our Autumn/Winter Catalog and Holidays from the Heart Gift Guide.

AND...not to mention, if you place an order of just $50, you can always get the Stamp of the Month for just $5!  This is it!  Soooo cute for cards or layouts.
Look at this sample artwork, courtesy of the CTMH Art Department, using the stamp set.
To qualify your order for a drawing of a minimum of $25 in FREE products, contact me to place your order or feel free to place it online through the homepage of my website.  You will see a link for the Cyber Week party in the bottom right-hand corner of the page.

I am always available for questions should you have them.  You can contact me through phone/text (575-693-7087) or at mlisrobinson@yahoo.com.  Thank you in advance for your support of my business.

Happy shopping!

Sunday, December 1, 2013

24 days until Christmas!

Can you believe Christmas 2013 is almost here?  I do not know about you but I can definitely measure how fast a year is going by judging the pace of the school year and this one...is going WAY FAST!

I am excited to post, on this first day of December, a fun Christmas card I made using a stamp set called "Wintry Wishes".  It is exclusive to Hostesses.  Isn't it cute?  I have grown to think penguins are adorable so was thrilled to get this stamp set and create with it.
I used our NEW Sparkle & Shine Paper Packet which is one of the products that was released through our Holidays from the Heart Gift Guide that was released in October.  You can still get your hands on it!  I will be sharing more artwork using this paper packet in my December newsletter and throughout the month.  It is perfect for your Christmas cards or layouts.  
I paper pieced the penguin's scarf and earmuffs.  If you do not know how to do that technique, I simply stamped the penguin image not only on the white cardstock, but also on Tulip cardstock and the striped B&T.  I cut out the respective pieces and glued it onto the full image.  Too fun, right?!

If you have followed me for long, you already know how much I love our Ribbon Trim and CTMH came out with a Red Ribbon Trim with these Christmas products.  WOOHOO!  I also put a Bitty Clear Sparkle on the center of the snowflakes and then used Silver Glitz Glitter Gel to bling up the outer parts of the snowflakes.

This card pattern came from one of our How-To Programs, Make It From Your Heart, Volume 2.  It is well worth the $7.95.

Here is a card made by the CTMH Art Department that also showcases this stamp set.
If you would like to get your hands on this stamp set or one of our other exclusive hostess sets, you simply have to have Gathering sales that total just $150.  See if a few of your friends need some products and you can earn a minimum of $25 in FREE products with just $150 party total.  You can also enter to win $25 in hostess credit by placing an order through my website.

In honor of Cyber Monday, I am offering a Cyber Special through the end of the day (MST), Saturday, December 7th. View my blog tomorrow (Monday, December 2nd) for complete details.  Click HERE to place your order through the link located on the bottom right of my webpage titled, "Cyber Week".  If you have any questions, feel free to contact me.

Have fun preparing for Christmas and stay warm!

Sunday, November 10, 2013

Gratitude with an Attitude Artwork Hop

One thing I am thankful for, in being a member of the Close to My Heart family, is the fabulous connection you can have with other Consultants on your team.  With that being said, I am honored to participate in this hop being offered through the Stamper's with an Attitude Team, hosted by Melinda Everitt.

This hop is one big circle, with 13 Consultants participating, so feel free to move through the hop at your leisure.  I know you will enjoy all the fabulous artwork shared.  If you are coming from Barbi's Paper Creations you are on the right track!

This is the first time I incorporated a Cricut cut sentiment on a card.  This one is coming from our newest cartridge called Artbooking.  It has so much potential and you will love it if you do not already own it.
Incorporating one of the paper patterns from our Babycakes paper packet, I used the Harvest Happiness stamp set to create the leaves and acorn - which coordinates with our Artiste Cricut cartridge - NO CUTTING REQUIRED.  Gotta love that!

A little Bronze Shimmer Trim, some Opaque Adhesive Gems, and the use of our Scallop Border Punch helped finish off this card nicely.  I hope you like it!

Thank you for stopping by and feel free to leave a comment.  Now hop on over to Jen Patrick's blog, heck out her fabulous creation and have a fabulous fall week!


Wednesday, October 16, 2013

Heartfelt Wishes

One of the teachers at my school is getting married in early November and we are having a bridal shower for her today.  Somehow I was left responsible for the packaging of the gift - forgot to take a photo of it - and her card.
Using the For Always paper packet (retired), I incorporated a little of our retired Hydrangea CS since purple is her favorite color (as it is mine).  The card design came from our Wishes How-To Book.  The pattern is called "Medallion" and is found on page 52.  At just $14.95, this book is a steal!
Because I choose to stamp the sentiment on Black cardstock, I used our White Daisy ink pad.  I let it sit overnight to dry and it was perfect.  If you use our pigment inks, like White Daisy, and do not have time to wait, you can always heat set it.  

I will admit, I had some off-brand flourishes that had been given to me some time back and I thought I would use them but...they were horrible to work with!  As I tried to lift one of them off the carrier sheet, some of the jewels came off.  As I attempted to work with the other, before I knew it, it had shriveled into a little ball that I could not separate.  But when I picked up Close To My Heart's Sparkles Clear Flourishes - Small, I had no issues!  Pulled it off, placed it where I wanted it, and applied a little pressure.  Gotta love when the value of our products are revealed to me!

Enjoying having my mojo back!  GUESS WHAT DAY IT IS?!  HUH?!  HUH?!  HAPPY HUMP DAY!

Tuesday, October 15, 2013

Can't get enough of Laughing Lola!

I enjoy sketch challenges because if you do not know me very well...it's very seldom that I can come up with an idea completely out of the air.  However, give me a little jump-start and I am able to put my own little twist on things.  

The sketch I used for these cards comes from Sketch Challenge #194 from this blog.  One of the things I especially appreciate about this blog challenge is that they provide the dimensions - NO GUESSING!  Gotta love that!  
194 Sketch (Oct 13)
This card sketch had quite a bit of layers but I think that added to the overall design of this card.  With the busy B&T pattern from the Laughing Lola paper packet I feel it helped to soften it a bit and just made the overall card more fun.  

 I did paper-piece the gift image and included a little Silver Glitter Gel and Black Mini Medley Accents Collection to spice things up a bit.
With a little Black Hemp, I felt that is all this card needed.  Oh!  The heart was stamped on B&T and then cut out and glued on top of the heart image from the stamp set.  (A tad bit of paper-piecing.)

I continue to use the "M-size" stamp sets from Close To My Heart for the sentiments/focal points on these two cards.  They are a perfect size that fit into most spaces and only cost $2.95 each!  Click here to view the "I Love You" image and the "Gift" image.

All products used are from Close To My Heart.

Enjoy the rest of your week!

Sunday, October 13, 2013

Got my mojo back!

The life of an elementary principal is a fast and furious one.  We have experienced a great start to the school year but I find myself working my days and nights away.  Things have slowed down a bit as I have begun to get into a routine.  My days are still long but at least I am intentional about taking time for me on the weekends.  Unfortunately, up to this point, that time has resulted in some much needed rest!  However, I had an itch to get back into creating and am happy to say I finished some projects this weekend and am still playing tonight (as I watch the Cowboys' game).

Tonight I decided to participate in the Monday Mojo Sketch Challenge which is pictured below.  You can check out their website by clicking here.  We are allowed to put our own little twist on it by incorporating various kinds of supplies.
This is what I created today.  I used some of Close To My Heart's retired paper packet, Flirty.  The floral B&T is a fun and cheery pattern and will be perfect for a co-worker who celebrates her birthday this week.  I added Antiqued Gold Mini Medley Accents, Cocoa Ribbon, and Hemp Baker's Twine to put on the finishing touches.  (All products are from Close To My Heart.)
Thanks for stopping by.  Watch for more artwork to come over the next few days.  Make it a great week!

God Bless,


Sunday, September 15, 2013

Christmas in...September?!

Sure!  Why not?!

I cannot believe I created 15 Christmas cards today while watching some college football.  While I still need to make some more before December 25th arrives, it's a great start!  I think this is the first time I have ever had this nice of a head start and it feels good!  Why not join me?

These were the card samples as designed by designers at Close To My Heart.
I made 15 cards - five each of three designs - using our Frosted Workshops On the Go Card Kit (shown below).  I did switch out Olive cardstock for Cotton Candy cardstock and really like the results; just a nice and different twist.

Here are the three cards I created..  I used the guide provided with the kit and followed it almost to a "T".  It was nice not having to think but just create.

The Frosted Card Kit is just $24.95 - that's just $1.66 a card - and you still have supplies left over to make additional cards if you choose.  What a deal and who on your Christmas card list would not enjoy a handmade card from you?
If you would like to purchase a kit of your own, please visit my website.  The card kit can be found by clicking here. Let me know if you have any questions.

Merry Christmas!  (Well...kinda of!)